How to Import Contacts
This step-by-step walkthrough answers the questions: "How do I import a list of contacts?", and "How do I add multiple contacts at once?"

Step 1: Prepare Your Spreadsheet
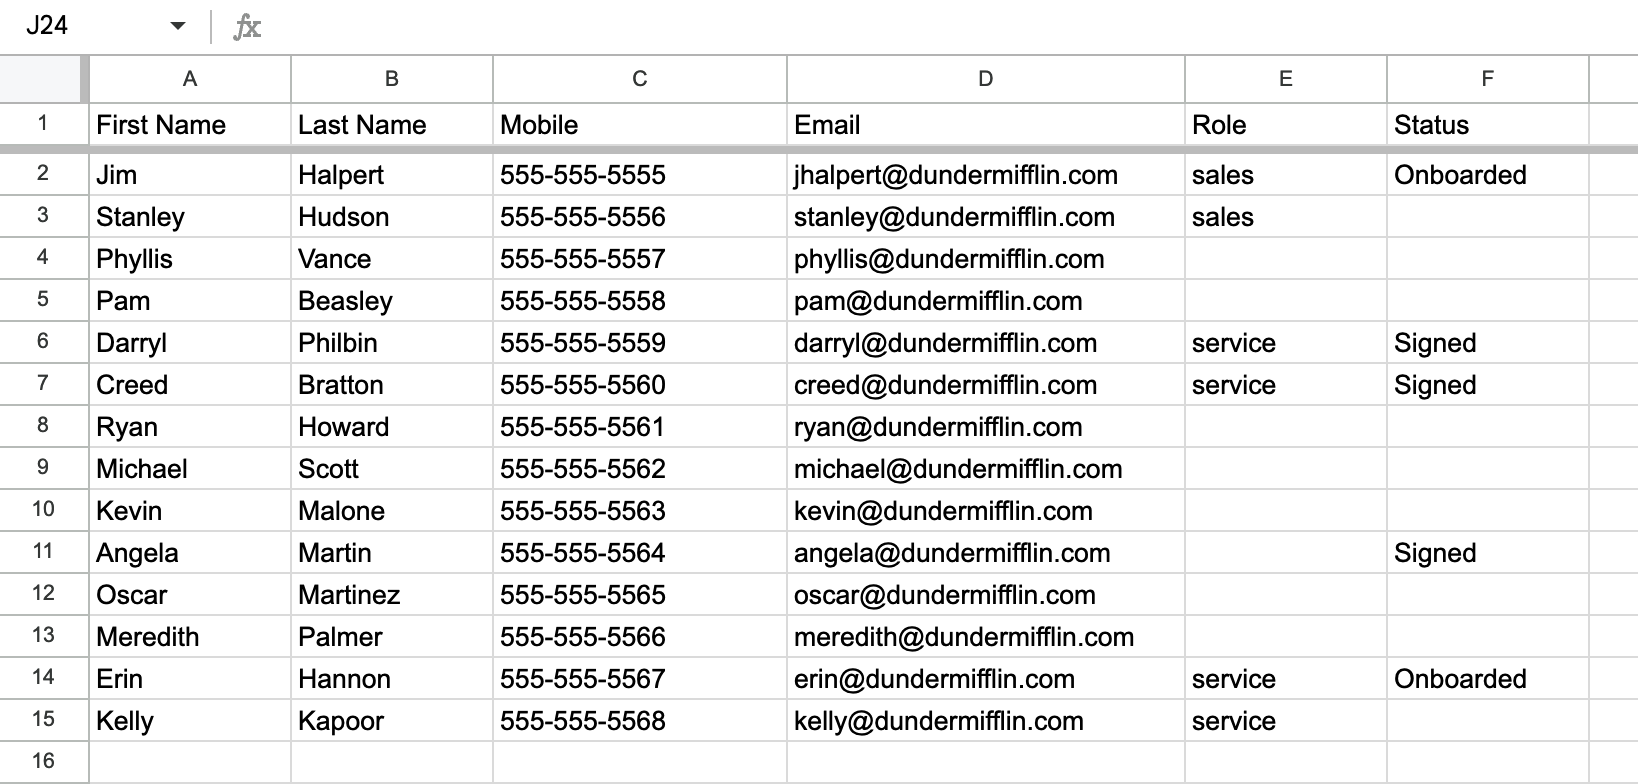
Ensure that the data in the spreadsheet is clean.
Verify that there is a single header row in the spreadsheet.
Confirm that first name and last name are separated into two columns.
Optionally, name the phone field "mobile."
Format the phone number as desired (parentheses not necessary).
NOTE: the headers in the spreadsheet will be generated as fields.
Export the cleaned document as a CSV file.
Step 2: Import into ConveYour
Open the ConveYour application and navigate to the Contacts page.
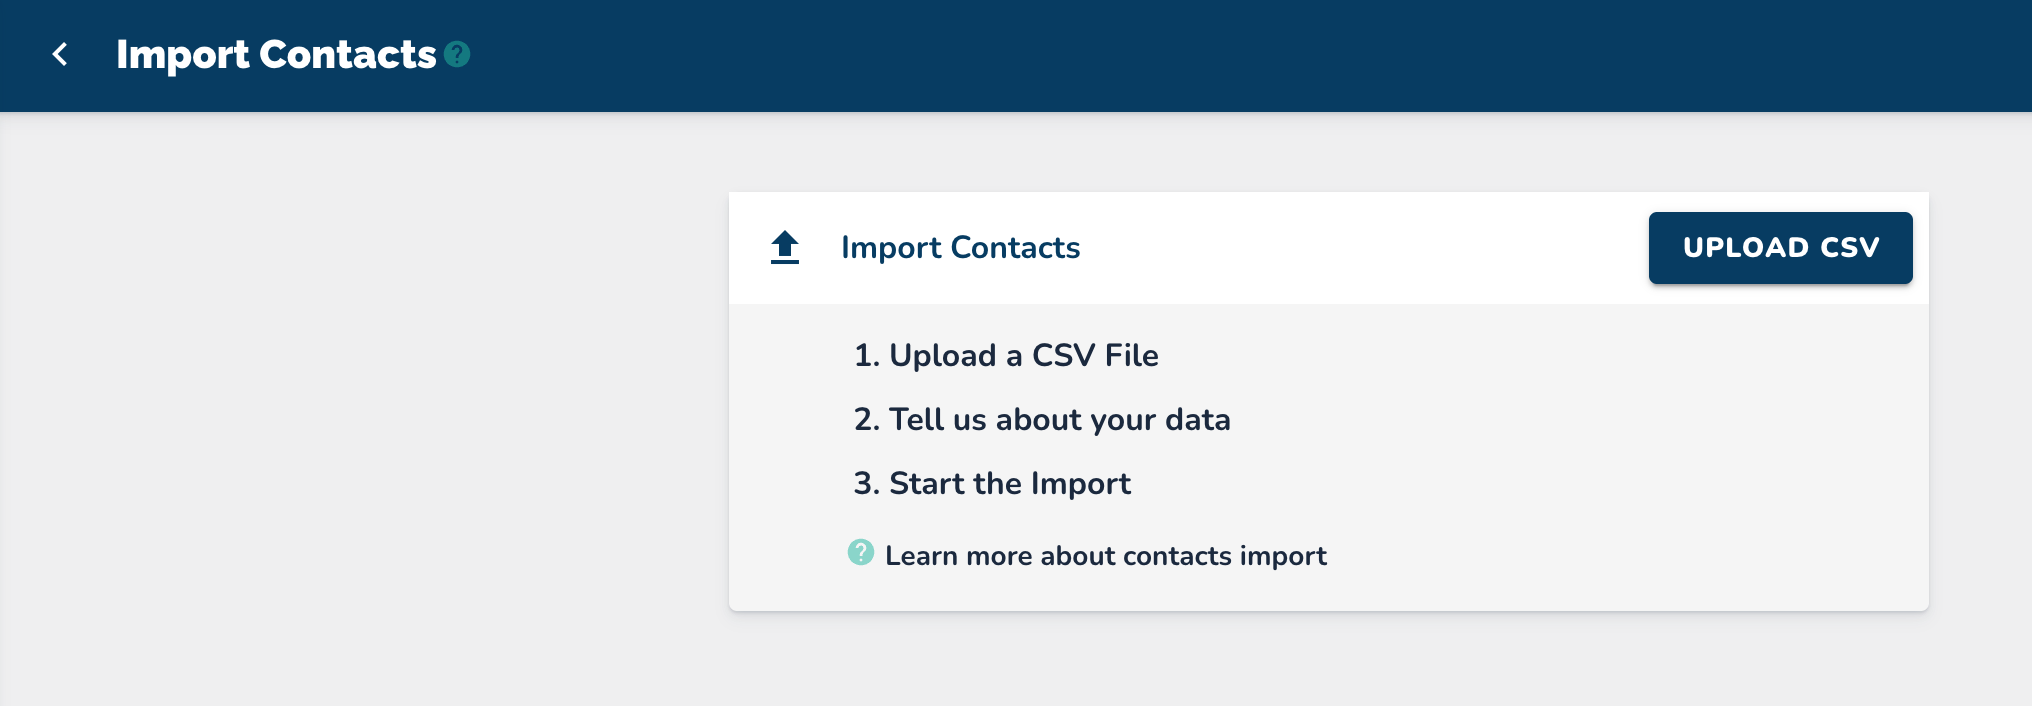
Click on "Import Contacts."
Select "Upload CSV."
Choose and upload the CSV file.
Check for matching fields: first_name, last_name, email, and mobile.
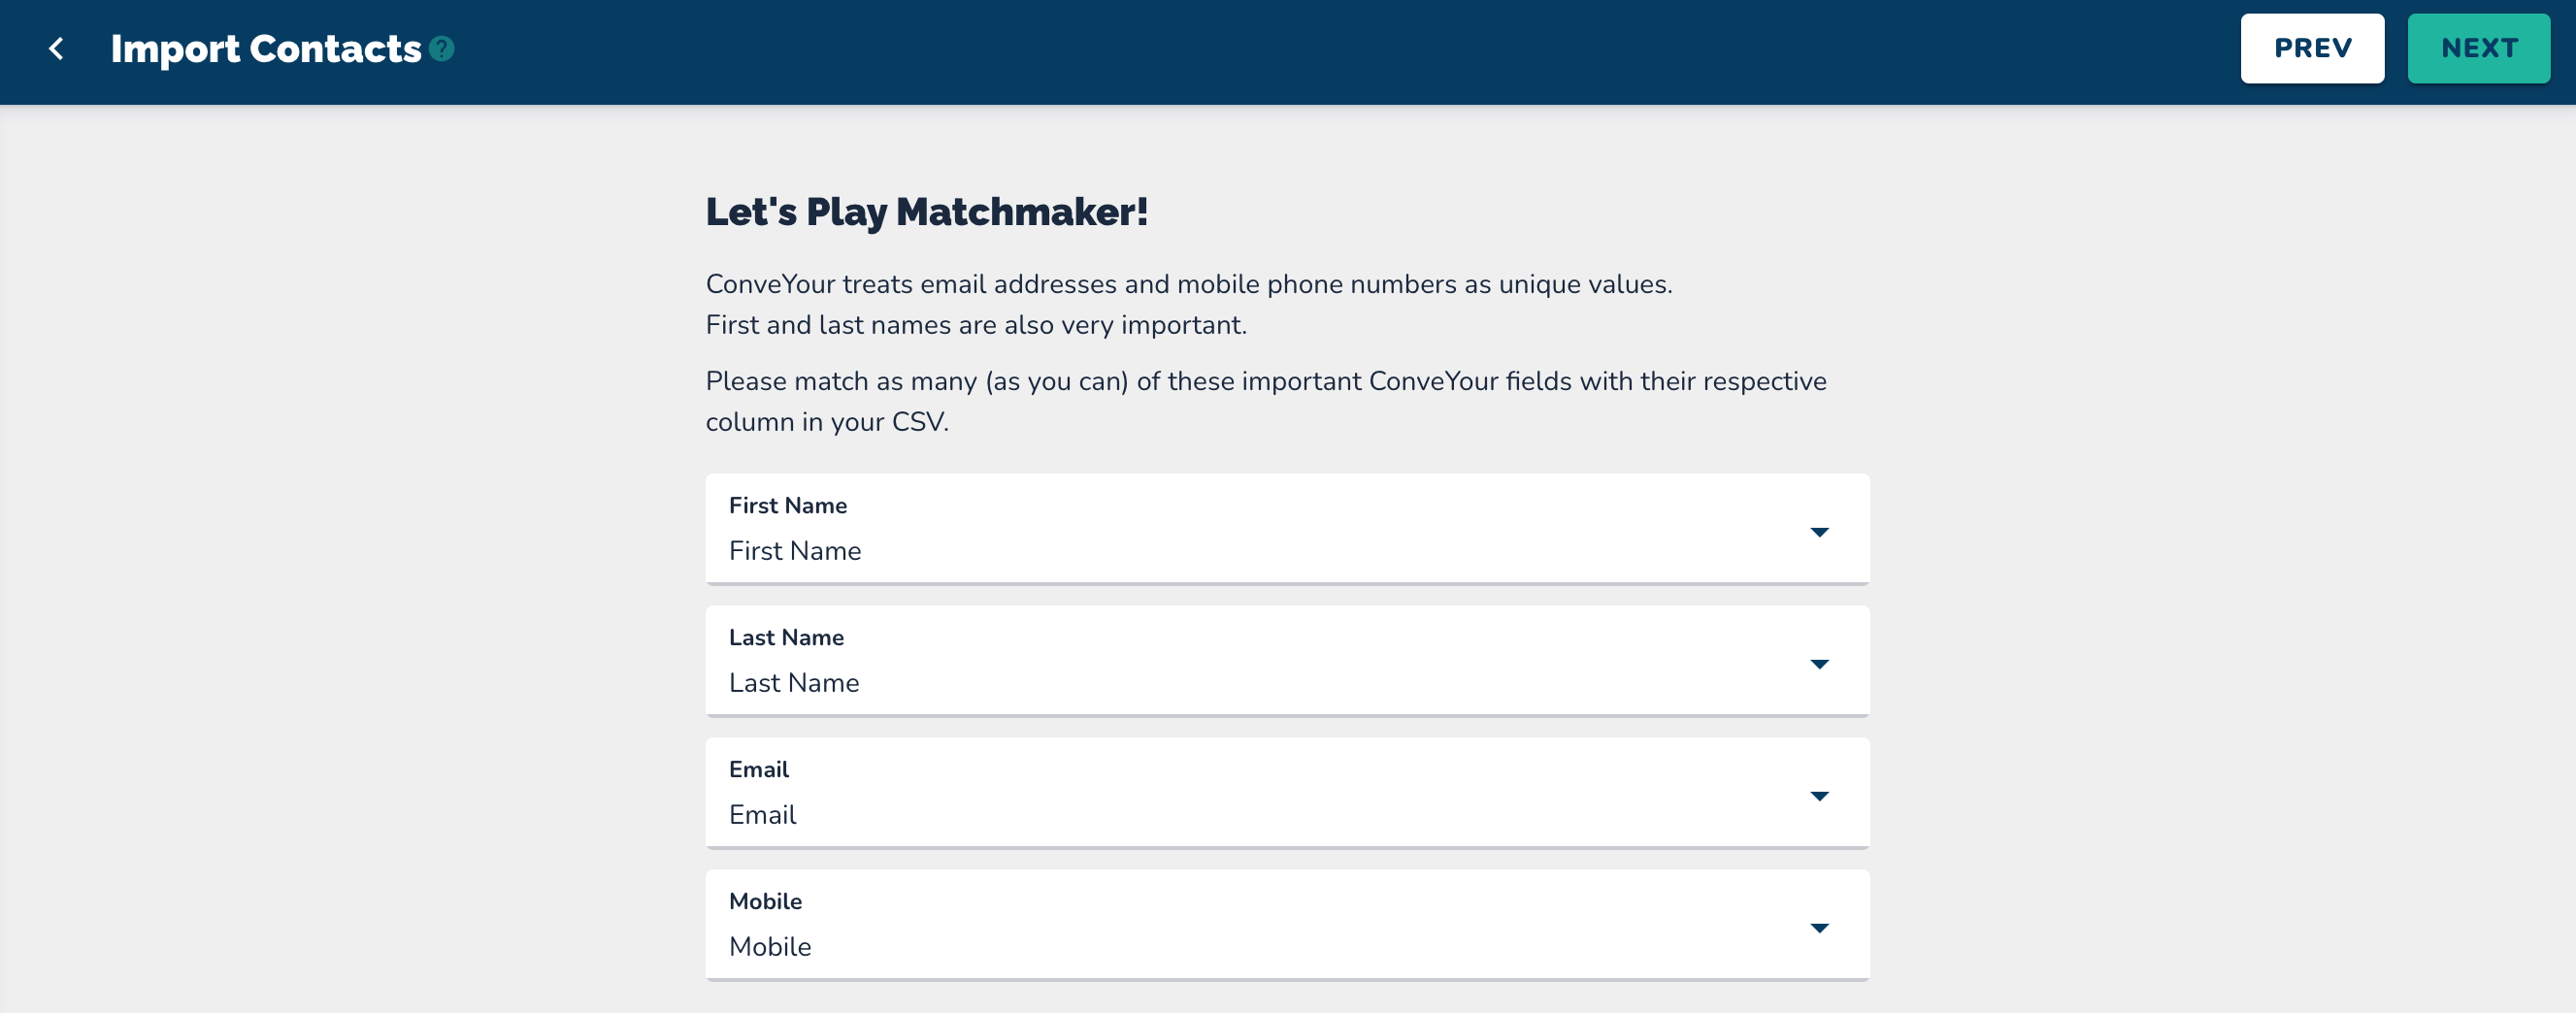
Click "Next" in the top right corner.
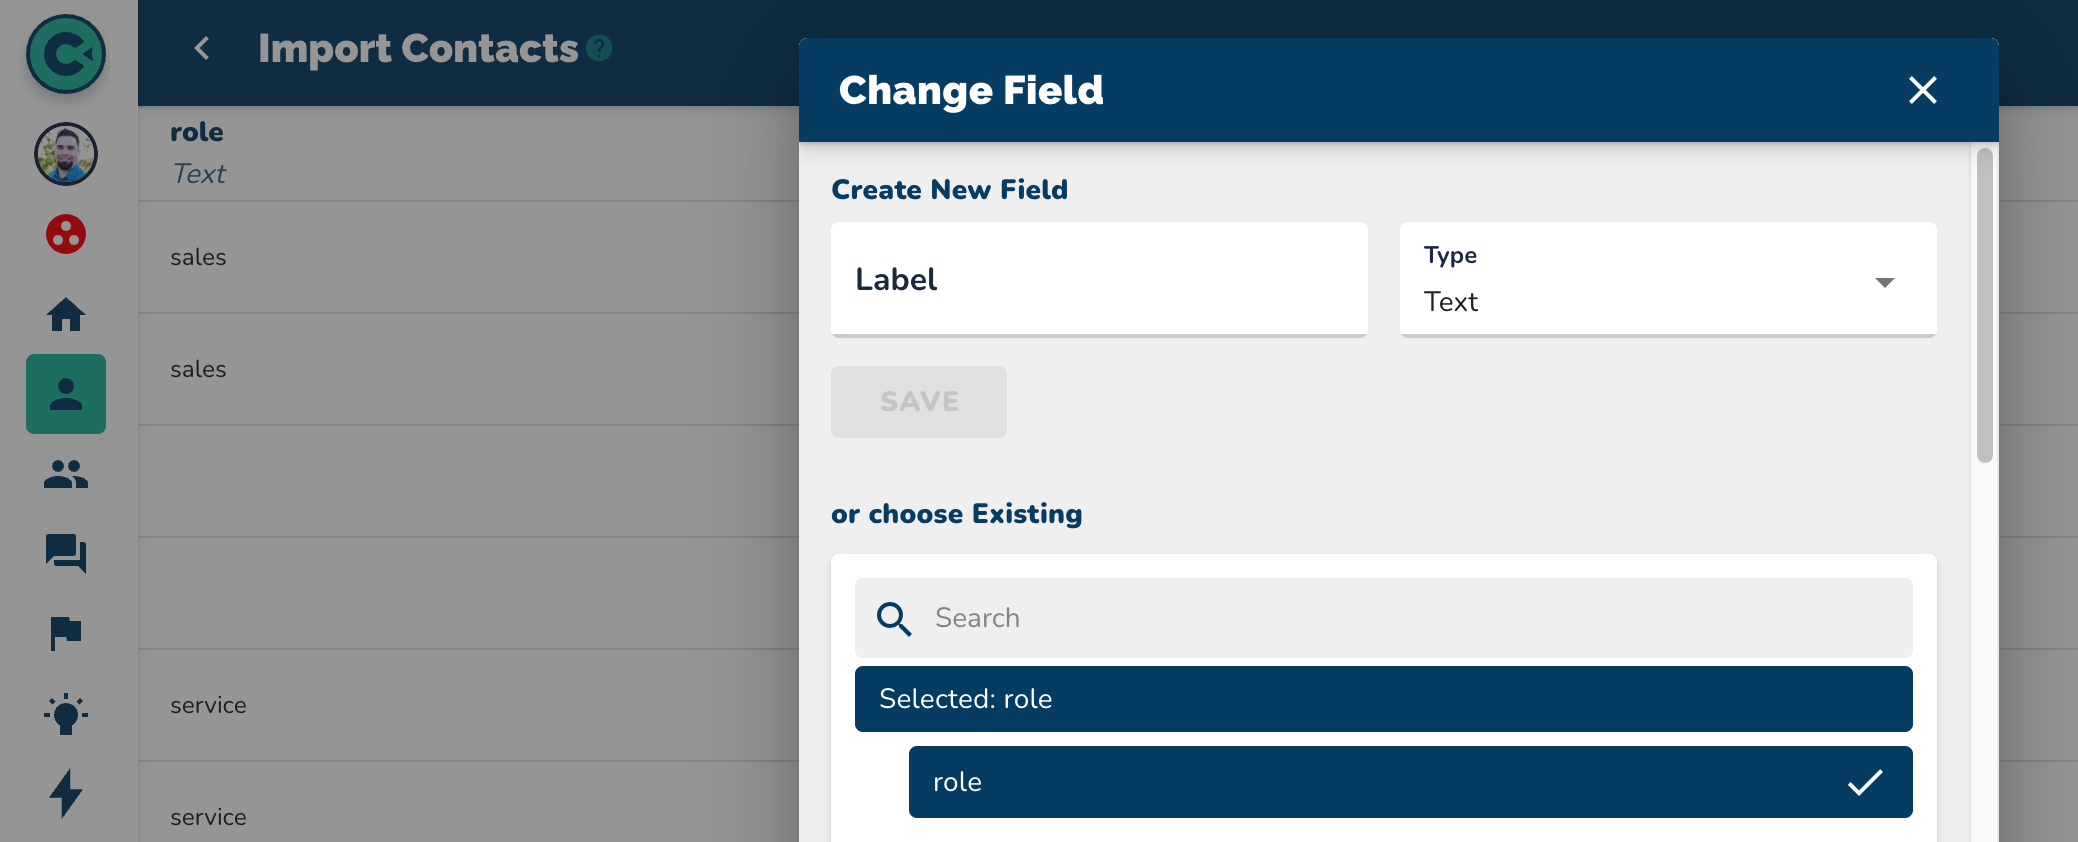
Review existing fields; new fields will appear if they do not exist already.
Decide whether to bring in the value for new fields or skip them (crossed out if skipped).
Click "Next" after verifying the contacts.
Add Options:
a. Name your import (for reviewing the import report later)
b. Toggle Button to "Only update existing contacts"c. Add a tag (default is "import_" followed by the date)
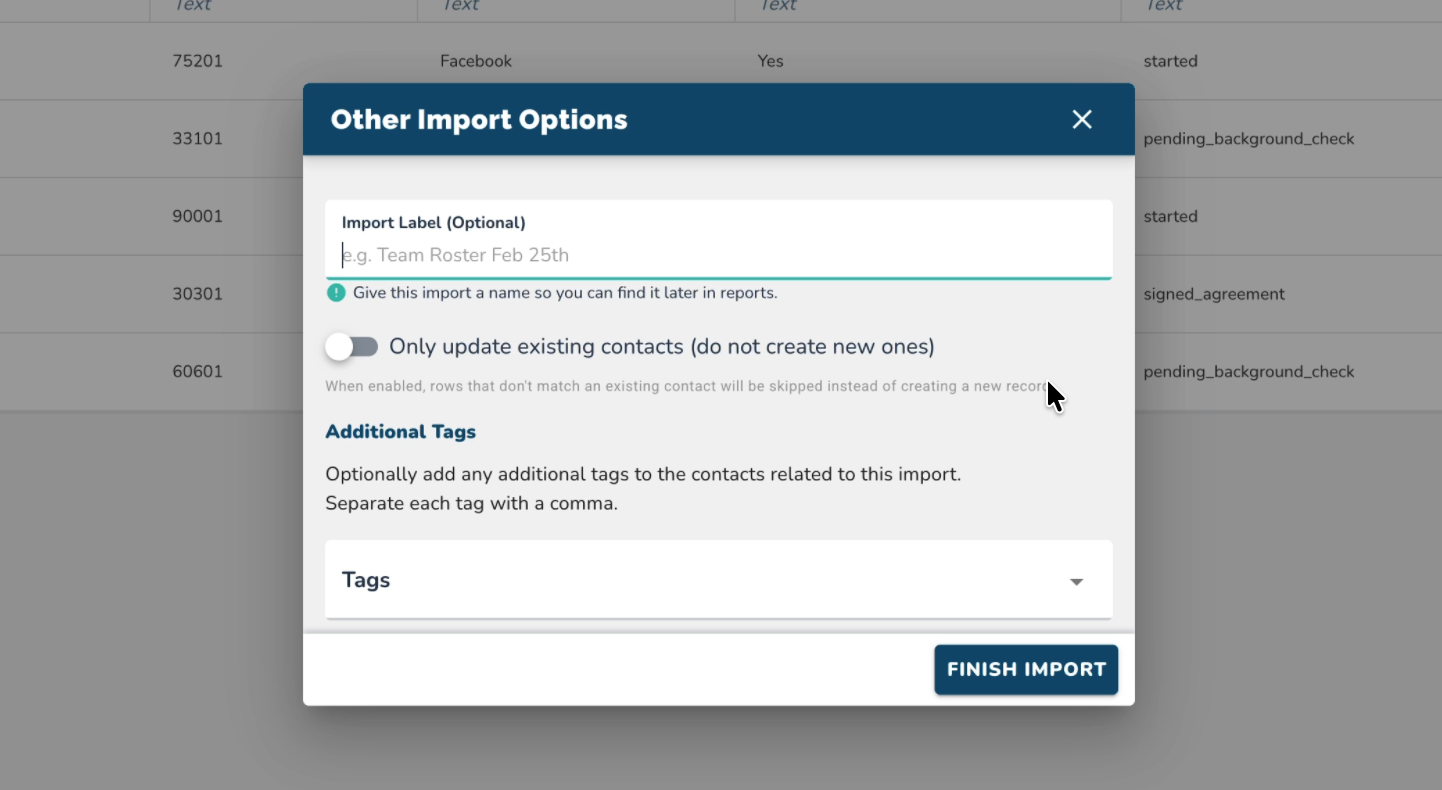
Click "Finish Import."
Wait for the "Success!" Message
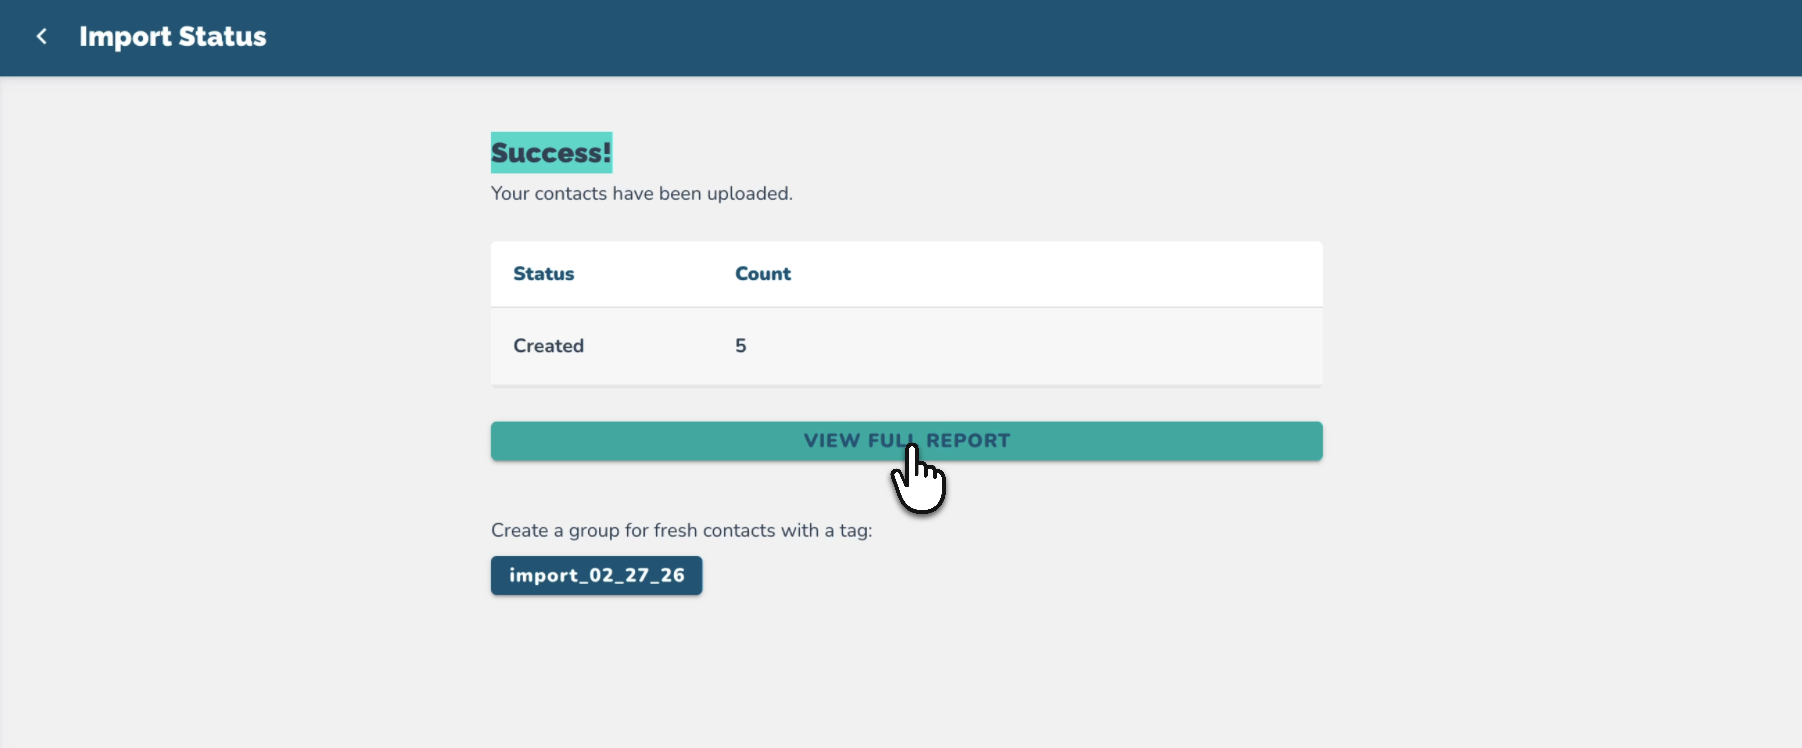
Step 3: Review Your Import Report
Select "View Full Report" (see image above)
Confirm the data in the report
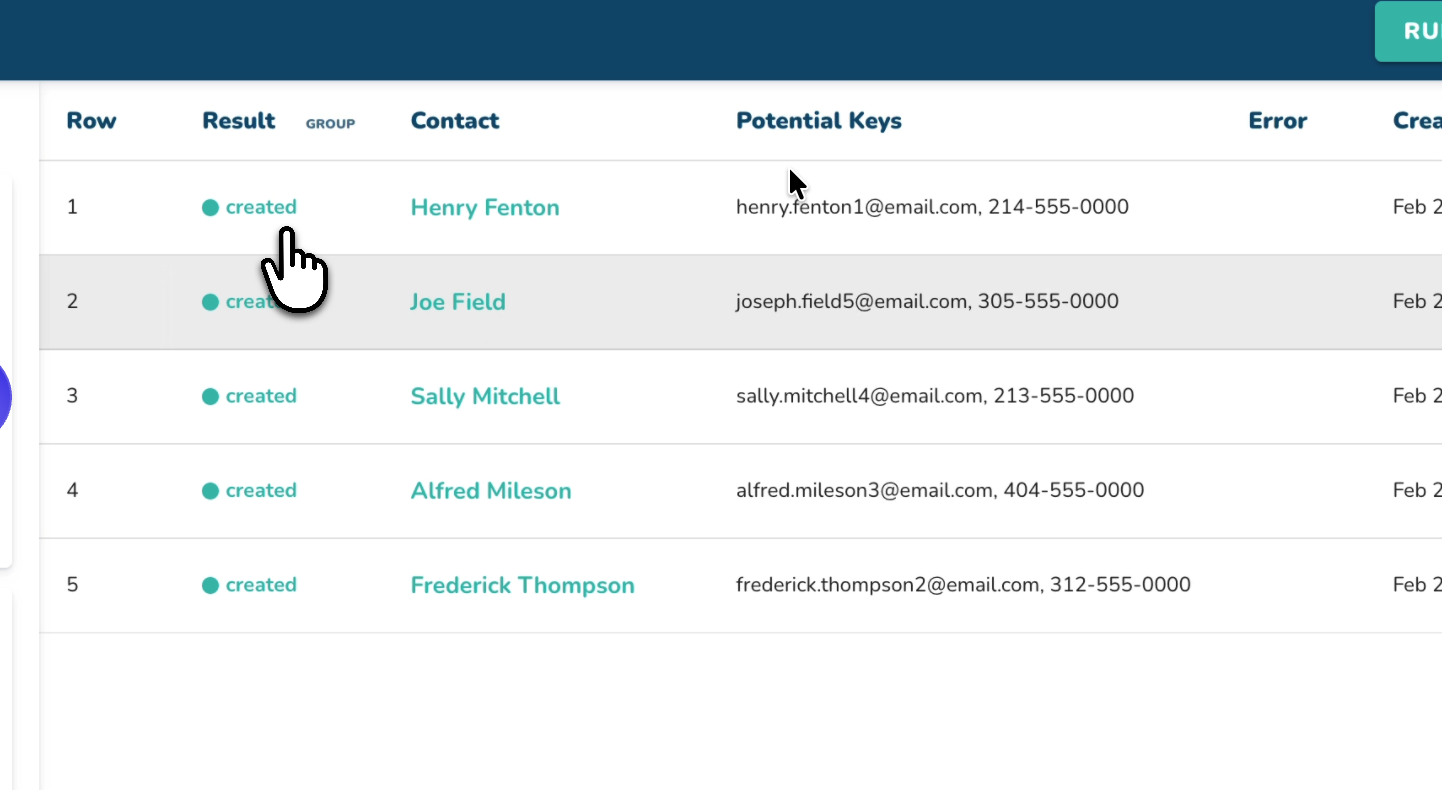
You can also select the "import" tag to view the list of contacts you imported/merged.
More in Quick How To's

Quick How To's
How to Add a Single Contact
This step-by-step walkthrough answers the questions: "How do I add a contact?", "How do I add a single contact?", and "How do I add one contact?"
Quick How To's
How to Update Contacts
This step-by-step walkthrough answers the questions: "How do I update a contact?", "How do I change a contact's status?", and "How do I edit a contact's information?"
Quick How To's
How to Search for Contacts
This step-by-step walkthrough answers the questions: "How do I find a contact?", "How do I contacts?", and "Is there a way to search for people?"
Quick How To's
How to Send SMS Texts to a Contact
This step-by-step walkthrough answers the questions: "How do I send SMS texts to a contact?", "How do I send SMS texts to all my contacts?", and "How do send texts?"