Billing Options in ConveYour
ConveYour Makes it Easy For You to Sell Your Content
ConveYour allows you to charge for courses/campaigns using Stripe. This guide walks you through setting up payments, subscriptions, and discounts.
With ConveYour’s billing system, you can:
Charge a one-time fee for a course or challenge.
Run a coaching membership with a monthly subscription.
Track payments and sales in real time.
How to Charge for a Course
1. Set Up a Stripe Account
If you don’t have one, create a Stripe account.
2. Connect Stripe to ConveYour
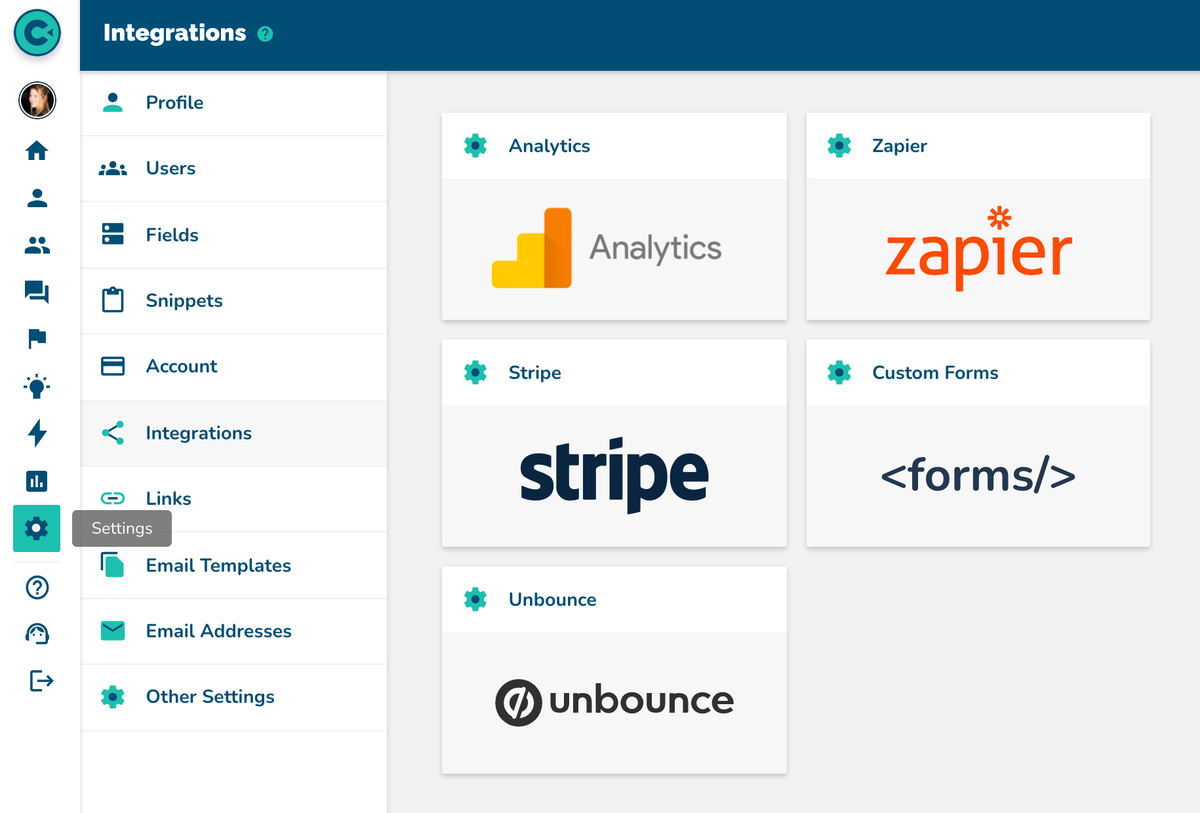
Navigate to Main Menu > Settings > Integrations > Stripe.

Click "Connect" and follow the on-screen instructions to connect to Stripe.
Go to Stripe and create a Product.
Assign a one-time price or subscription model.
Generate a Stripe Plan ID.
Return to ConveYour and navigate to Main Menu > Campaigns > Billing.
Click Setup Billing.
Enter the following details:
Price – Set your course fee.
Currency Type – USD, EUR, etc.
Stripe Plan ID – Copy from your Stripe account.

Once set, billing is enabled, and users will be required to pay before accessing the course.
Managing Billing Settings
Update Billing – Modify course pricing anytime.
Make This Course Free – Remove the price requirement.
 How Participants Sign Up and Pay
They visit your landing page.
They enter their name, email, and optional mobile number.
After submitting their info, the Stripe payment box appears.
Once payment is successful, they gain access to the course.
Note: Payments are processed through Stripe, not ConveYour.
Coupons & Promotions
You can use Stripe’s coupon feature to provide discounts or promo codes.
More in Campaigns
Campaigns
Campaigns Introduction and Overview
Introduction to Campaigns in ConveYour, what they are, how they are used
Campaigns
First Steps
Getting started with campaign setup in ConveYour

Campaigns
Testing Your Course or Campaign
How to test your campaign within ConveYour and from the End-User perspective

Campaigns
Campaigns: Can Late Joiners Catch Up?
How to release or schedule content so late joiners can "catch up" on content.