Settings in ConveYour allow you to configure preferences for data fields, reusable text snippets, integrations with other programs, sender email addresses, learner portal themes, and more.
What Can You Do in Settings?
Profile – Update your profile picture, personal information, and messaging preferences.
Users – Add new users and assign their roles.
Archived Users – View and re-invite previous Users
User Permissions – Update the permissions for Guest Users.
Roles – Update permissions en masse for Guest Users.
Teams – Set up details for each Team.
Fields – View and add new or custom contact data fields.
Account – View your account settings.
Integrations – Connect ConveYour with external applications.
Portal Settings – Set the design, color, theme, and imagery for your learnerportal.
Links – Create dynamic links to pass user data, such as coupons.
Other Settings – Manage organization details, Email Settings, and Conversation Settings.
Email Templates – Store frequently used, formatted email messages.
Email Addresses – Configure custom sender email addresses.
Snippets – Save reusable text snippets for quick responses.
Profile Settings
Update Your Profile Information
Under Main Menu > Settings > Profile, you can update your personal details, including your name, profile picture, and email address.
Email Address – This is the email where you receive system alerts and messages.
Mobile Number – This is your personal contact number and is not the ConveYour texting number. Your ConveYour texting number is displayed at the top of the settings page.
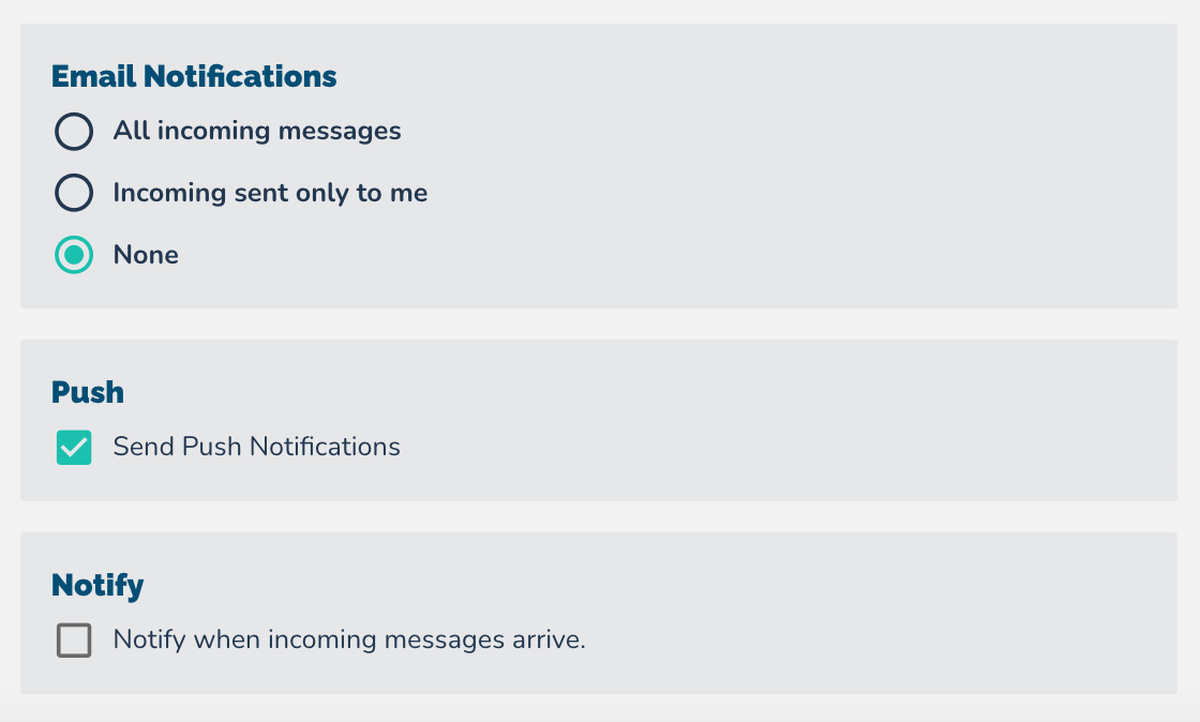
Set Messaging Preferences
You can configure how ConveYour notifies you about activity and messages. Options include:
Push Notifications – Enable this if you want alerts for new contacts, campaign activity, or incoming messages.
Email Notifications – Choose whether to receive system emails when new messages arrive.
Incoming Message Notifications – Determine if you should be notified of all incoming messages or only those assigned to you.

Users
Admins, guests, and platform owners are listed under Settings > Users. Here, you can:
Update team members' profiles.
Adjust roles and permission settings.
Modify notification preferences.
Example
One admin may turn off push notifications to avoid unnecessary alerts.

Another admin who manages incoming messages may enable all notifications.

Archived Users
Archived users can be found by navigating to Main Menu > Settings > Archived Users.
Updating Permissions
Owners and Admins can update permissions for Guest Users.
Admins can change users from Guests to Admins.
Owners can update permissions for Admins.
Guest Users cannot modify campaigns or automations.

To Adjust User Permissions
There are two ways to update user permissions:
Option 1: Using the Users Tab
Navigate to Main Menu > Settings > Users.
Click on a user’s name to open their profile.
Scroll down and select View Permissions.
Update permissions for each tab.

Option 2: Using the User Permissions Tab
Navigate to Main Menu > Settings > User Permissions.
From here, click the checkboxes to set permissions for your Guest users.

Learn More About Assigning Permissions >>
Teams
If your ConveYour account has Teams enabled, you can choose settings for your Teams by navigating to Main Menu > Settings > Teams. From here, you can set:
Team Label - Give your Teams an identifying name.
Texting Number - Select an SMS number associated with the selected ConveYour Team.
Color - Choose an identifying color for your Team.
Team Users - Determine which users are part of your selected Team.
Team Contact Group - Set which ConveYour contacts are visible to the selected Team.
Contact Fields - Select which contact fields will be visible to the selected Team. If none are selected, all fields will be visible.
SMS Auto-Reply - Set a default message to respond to any incoming messages to your Team SMS number. Placeholders can be used here!
Block Incoming SMS - Completely block incoming messages to your Team SMS line. Blocked messages are not stored.
Portal Messaging - Only available to accounts that have portal messaging enabled. Allow contacts to contact Team users within their learner portal.
Fields
Fields store contact-specific data in ConveYour. They can be found at Main Menu > Settings > Fields. From here, you can:
View all existing fields.
Add custom fields to track additional information (e.g., region, department, sales status).
Configure permissions for each field to control who can edit or view it.

Customizing Field Settings
To customize a field:
Navigate to Main Menu > Settings > Fields.
Click the Gear Icon next to a field.
Modify:
Display settings – Choose which fields are visible when viewing the contact list.
Editing permissions – Determine whether Admins or Guests can modify the field.
Dropdown options – Create a preset list of values for easier data entry.

Click Save Changes.
For example, you might create a dropdown for a "Sales Stage" field with options like New Lead, Follow-Up, Closed Won, Closed Lost.
Learn more about custom fields >>
Account
By navigating to Main Menu > Settings > Account, you can:
View your payment information for your ConveYour account.
View past ConveYour invoices.
Select a new pricing plan.
Integrations
ConveYour integrates with external tools like:
Stripe – Process payments for courses and content.
Zapier – Automate workflows between ConveYour and other apps.
Unbounce – Sync landing pages with ConveYour campaigns.
To set up an integration:
Navigate to Settings > Integrations.
Select an integration (e.g., Stripe).
Follow the on-screen steps to authenticate and connect your account.
Learn more about ConveYour's Integrations >>
Links
Use Links to create dynamic URLs for your learners. Links can be created by navigating to Main Menu > Settings > Links. From here, you can:
Automatically pull user-specific data into external links.
Redirect users based on custom parameters.
For example, you could generate a link that:
Includes a user's discount code for a promo.
Directs them to a pre-filled form with their details.
Email Templates
Navigate to Main Menu > Settings > Email Templates to create and store formatted email templates. You can use these templates for:
Campaign invitations.
Course completion follow-ups.
Sales and outreach messaging.
Use the built-in WYSIWYG editor to:
Add images and branding.
Format text with headers and colors.
Insert placeholders for personalization.

Email Addresses
Under Main Menu > Settings > Email Addresses, you can customize your "From" email address for outgoing messages.
Why Customize?
Prevent emails from being flagged as spam.
Improve deliverability and branding.
Custom Sender Email Setup
Navigate to Main Menu > Settings > Email Addresses.
Add and verify your email.
Update DNS settings (SPF, DKIM) as needed for authentication.
Learn about Adding Custom Email Addresses >>
Other Settings
Business Information
Update your organization’s name and primary contact details.
Learner Portal Design & Branding
Customize the look and feel of your learner portal:
Theme – Light or Dark mode.
Highlight Color – Set a custom accent color.
Portal Logo & Icon – Upload branding assets.
Note: These settings apply platform-wide. If different branding is needed for specific groups, contact support for advanced customization options.
Learn more about Customizing the Learner Portal >>
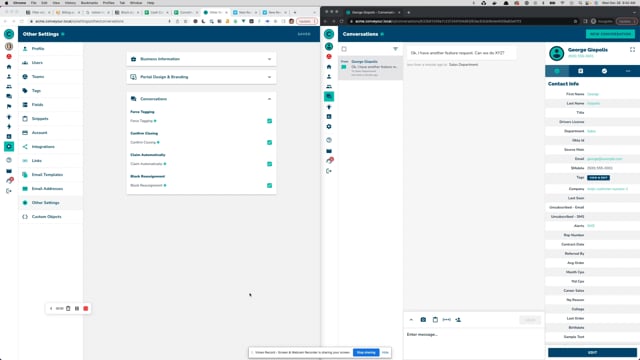
Conversations Settings
Here, you can access settings that relate to ConveYour Conversations.
Force Tagging - Force users to tag conversations.
Confirm Closing - Force users to confirm before closing a conversation.
Claim Automatically - Automatically assign a conversation when a user responds.
Block Reassignment - Block guest users from claiming or reassigning conversations that have already been assigned.
Conditionally Enable Portal Messaging - Avoid sending Portal Messaging links if certain contact fields are missing a value.
More in Settings

Settings
What are Roles?
Roles help you manage user access by grouping permissions into roles that can be assigned to one or more users.
Settings
Setting Up Your ConveYour API Services & Keys
This guide walks you through creating a ConveYour API service account, generating API keys, and testing your connection using Postman.
Settings
Conversations Settings
Conversation settings for better management of assignees and message tags.
Settings
Contact Fields
Keep track of any type of contact data with contact fields.