The Lesson Builder
The Lesson Builder is a powerful tool that allows you to create engaging, modular content for your learners. Lessons can include videos, interactive challenges, polls, checklists, and more to enhance learning.
This guide will walk you through creating a new lesson and configuring lesson items to build an effective learning experience.
Let's build a simple lesson! (5 minute video)
Creating a New Lesson
To create a lesson:
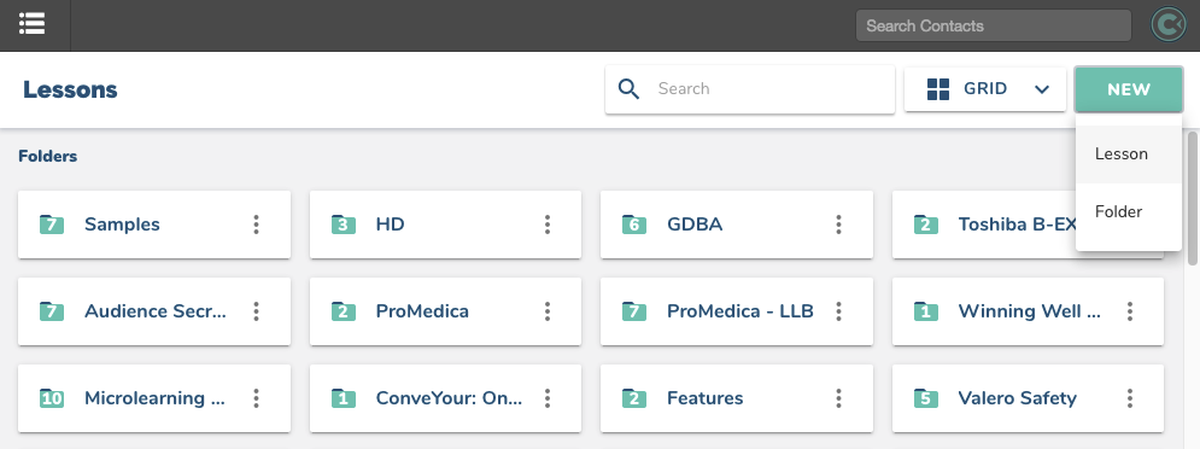
Navigate to: Main Menu > Lessons
Click New > Lesson
 You will see the option to start from scratch or use sample content as a template.
Start from Scratch: Opens a blank lesson builder.
Start with Sample Content: Provides a pre-built lesson structure to help you get started.ou can start with an example lesson - or you can start a new lesson from scratch:
 Lesson Builder Overview
Before you start adding content to your ConveYour Lesson, there are a couple of options available to you on the top-left of the lesson builder.
Renaming a Lesson
By default, a lesson is named using the creation date and time.
Click on the date/time field to rename the lesson.
The lesson name visible to learners is determined when adding it to a campaign.
 Configuring Lesson Details
Click Show More Options to upload an image associated with the lesson and add tags for easy search and reference.
 Adding Lesson Items
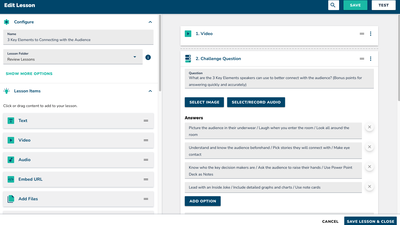
Drag-and-Drop Lesson Items
The left panel contains Lesson Items (interactive content formats).
Drag items from the Lesson Items menu the lesson stage on the right.
Edit, reorder, and configure each item as needed.
 Available Lesson Items
Videos, Audio, or Text: Deliver core learning content.
Challenge Questions: Test knowledge and retention.
Polls & Assessments: Gather opinions or gauge understanding.
Files & Embeds: Attach PDFs, images, or web links.
Full view of ConveYour Lesson Items >>
Organizing and Testing Lessons
Reordering Lesson Items
Click and drag lesson items to rearrange their order.

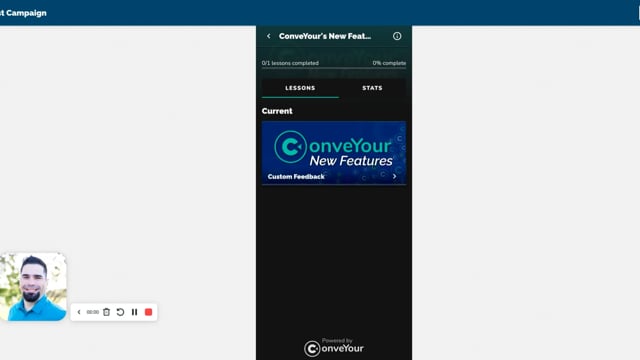
Testing a Lesson
Click Save and then Test to preview the lesson.
Test within a campaign to see how lessons flow together.

Copying Lesson Items Between Lessons
Open two ConveYour browser windows.
In the original lesson, click Copy to Clipboard on a lesson item.
Open the new lesson and paste the copied item (Cmd + V or Ctrl + V).
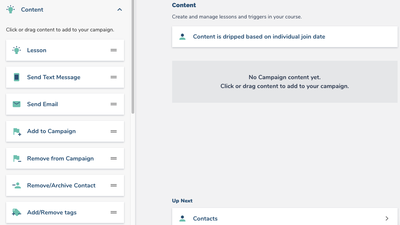
Using Lessons in Campaigns
Lessons can be used in multiple campaigns.
Any changes to a lesson will reflect across all campaigns where it's used.
If you need a lesson variation for a specific group, make a copy before editing.
Other Helpful Documents
More in Lessons

Lessons
An Introduction
Lessons in ConveYour
Lessons
Custom Feedback
Learn how to set up custom feedback on learner answers to boost information retention!
Lessons
Lesson Items
Types of interactive content, lesson items, a.k.a. "engagement formats" that ConveYour offers.
Lessons
Adding Lessons to Your Course
Adding Lessons to your ConveYour Campaign