Important Note: Add-On Feature
Conversation Assignments is an add-on feature and may not be enabled on all accounts.
To enable Conversation Assignments or learn more about pricing and availability, please contact our support team:
Use the in-app chat
Or email [email protected]
How to Set Up Conversation Assignments
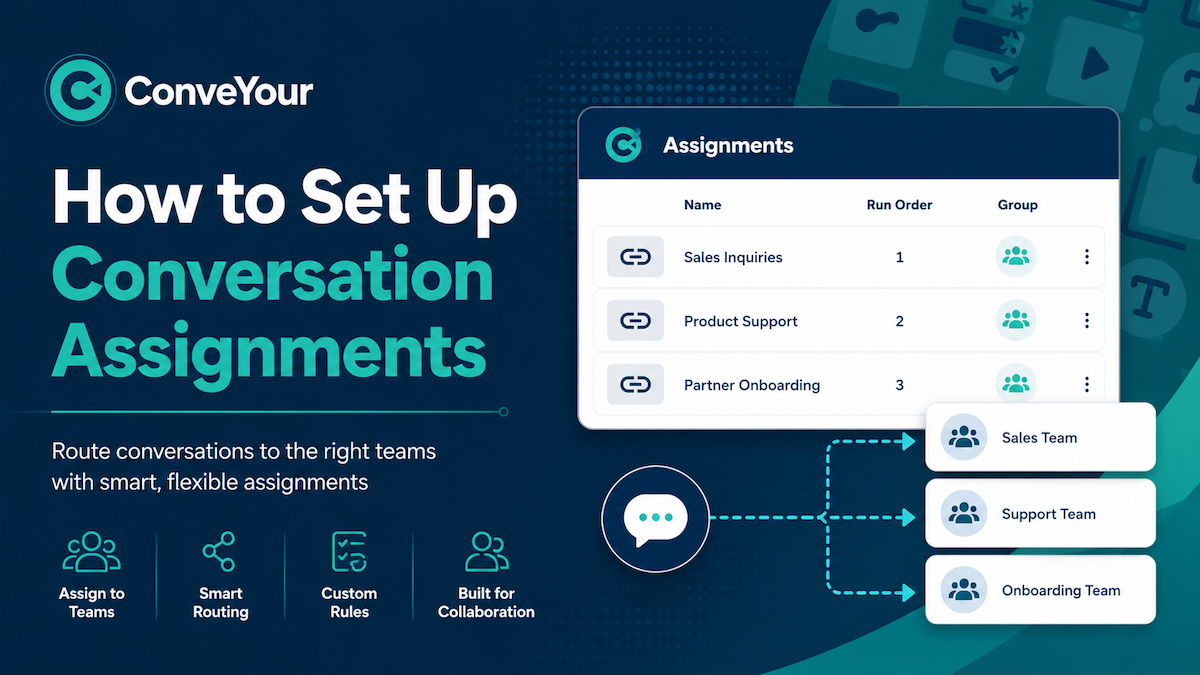
Conversation Assignments allow you to automatically assign incoming text conversations to specific users based on group conditions. When a contact texts in, the system can determine which team member should be assigned to that conversation.
Before You Begin
Before creating assignments, plan how you want your assignment hierarchy to work.
The Run Order determines which assignments are evaluated first. Lower numbers run before higher numbers.
A recommended numbering structure is:
1–99: First-tier responders
100–199: Second-tier responders
200–299: Third-tier responders
Continue the same pattern for additional tiers.
Leaving space between tiers gives you room to add additional assignments later without reorganizing your existing setup.
Step 1: Create a New Conversation Assignment
Navigate to More.
Select Other Tools.
Select Assignments.
In the upper-right corner, select New Record.
Enter a name for the assignment.
For example:
Dallas Manager
Use a descriptive name that makes it easy to identify who or what the assignment is for.
Step 2: Set the Run Order
Enter a number in the Run Order field.
The Run Order controls when the assignment is evaluated.
Lower numbers run first.
Higher numbers run later.
First-tier responders should generally have the lowest numbers.
For example, a Dallas Manager assignment that should be evaluated first could have a Run Order of:
1
Tip: Plan your numbering structure before creating a large number of assignments. Leaving room between tiers makes it easier to expand your team later.
Step 3: Choose Whether to Allow the Next Assignment
Locate the Allow Next option.
Enable Allow Next when another assignment should also be allowed to apply to the conversation.
For example, you may want:
A first-tier responder assigned to the conversation.
A manager assigned afterward.
Another higher-level user to also have access.
In this situation, enable Allow Next on the earlier assignments.
If the assignment should be the final level and no additional assignments should be applied, leave Allow Next disabled.
Important: Multiple users can be assigned to a conversation when Allow Next permits the system to continue evaluating additional assignments.
Step 4: Assign a User
Open the User dropdown.
Select the person who should receive conversations matching this assignment.
Select Save.
The dropdown contains the users available in your account.
If the person you need is not available, navigate to:
Settings → Users
Add or manage your users there before returning to the assignment.
Step 5: Create a Group for the Assignment
The assignment needs a group that identifies which contacts should be assigned to the selected user.
Navigate to Groups and create a group containing the contacts that should match the assignment.
For example, you could create:
Dallas Conversation Assignment
The group could use a condition such as:
Office = Dallas
Anyone who meets that group condition can then be assigned to the Dallas Manager when they text in.
Recommended Group Naming
Include Conversation Assignment or Assignment in the group name.
For example:
Dallas Conversation Assignment
This makes it easier to distinguish assignment groups from groups used for other purposes.
Important: A group created for Conversation Assignments should be dedicated to that purpose. Avoid using the same group for unrelated workflows.
If you have several assignment groups, consider creating a folder called:
Conversation Assignments
Then place all of your Conversation Assignment groups inside that folder.
Step 6: Find the Group ID
After creating the group, you need its Group ID.
Open the Conversation Assignment group.
Look at the URL in your browser.
Find the long ID that appears after
/ui/groups/edit/.Copy that ID.
The URL will follow a pattern similar to:
.../ui/groups/edit/GROUP-ID
Copy only the long Group ID portion after edit/.
Step 7: Add the Group ID to the Assignment
Return to:
More → Other Tools → Assignments
Then:
Open the assignment you created earlier.
Locate the Group ID field.
Paste the Group ID you copied from the group.
Select Save.
The assignment is now connected to the group condition.
Step 8: Verify the Assignment
Navigate to Conversations.
When a contact who belongs to the assignment group texts in, the system will automatically apply the appropriate assignment.
Using the previous example:
Contact Office: Dallas
        ↓
Dallas Conversation Assignment Group
        ↓
Dallas Manager Assignment
        ↓
Assigned User
The system checks for assignments approximately every minute, so a newly created assignment may not appear immediately.
Once the system detects the matching assignment, the assigned user will appear on the conversation.
Example Assignment Structure
A multi-level setup might look like this:
Run Order | Assignment | Allow Next |
|---|---|---|
1 | Dallas First-Tier Responder | Yes |
100 | Dallas Manager | Yes |
200 | Dallas Senior Manager | No |
With this setup:
The first-tier assignment runs first.
Because Allow Next is enabled, the system continues.
The manager assignment can also be applied.
The senior manager assignment runs later.
Because Allow Next is disabled at the final level, no additional assignments are applied.
Best Practices
Plan your Run Order before creating assignments.
Reserve number ranges for different response tiers.
Leave enough numbering space for future team growth.
Give assignment groups descriptive names.
Include Assignment or Conversation Assignment in assignment-group names.
Use Conversation Assignment groups only for Conversation Assignments.
Keep assignment groups organized in a dedicated Conversation Assignments folder.
Enable Allow Next when higher-level users also need to be assigned.
Disable Allow Next when the assignment should be the final assignment in the sequence.
Allow approximately one minute for the system to detect and apply newly configured assignments.